Fujimi F-16B
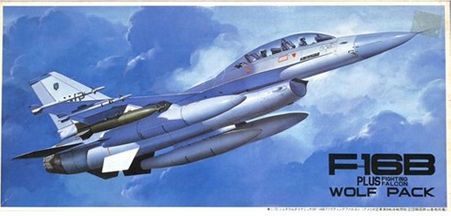
Subject F-16B Wolf Pack
Manufacturer Fujimi
Item No. 24005
Scale 1:72
Decal Options 1
Panel Lines Recessed
Materials Plastic only
Reviewer Geoff Cooper-Smith
In the box
Not the first (that honour goes to Hasegawa I believe), this Fujimi mould dates from the mid-80s and as is common with all their boxings is relatively scarce in the UK. This boxing seems to be the only one issued as a dedicated 2-seater and includes markings for a single aircraft (Block 15 No. 81-0814) of the 35th Tactical Fighter Squadron/8th Fighter Tactical Fighter Wing, based in Kunsan, South Korea, which is an interesting choice. Block 15 F-16Bs were the first fitted with the larger tail planes and an increase in the number of hard-points but are actually not that numerous and so marking options are quite limited. The Fujimi model actually has a fuselage top insert which allows it to become a single or twin seater; in some boxings you get the single seater insert, in others the twin seater insert, only in one, possibly two, boxing(s) do you get both inserts and the associated parts.
The top opening box contains around 65 parts on five sprues of light grey plastic, one sprue of clear plastic with the canopy (which we will come back to later), plus a small decal sheet and a double-sided instruction sheet in black and white. The sprues are sealed in a couple of bags with the two sprues for the underwing stores separate from the others; these include 2x GBU-10s (on their own sprue), 2x large (370 gallon) underwing drop tanks, 1x underbelly (300 gallon) drop tank and 4x AIM-9J sidewinders. The GBUs and sidewinders are quite softly moulded and could really do with replacing. The drop tanks look OK. Included as separate parts on the sprues are the REAW aerial, TACAN aerial and radar warning receivers.
The build
The worst part is by far the cockpit. Firstly, the fuselage insert to make it a twin seater needed a bit of fettling to get it to fit; this included a couple of filling and sanding sessions and some re-scribing. As usual with kits of the era the seats would look more at home in an American car and so these were replaced with a pair of resin examples (Pavla ACES II). They needed quite a bit of filing and scraping to get them to fit between the side consoles moulded into the floor and leaning back at 30 degrees. Decals are used on the flat-faced side consoles and both instrument panels. I just about got these on, but it they had aged badly and broke up in the water even with a coating of decal film applied before use. It thus became evident that finishing the kit in the box scheme wasn’t going to be an option meaning I had to start looking for alternatives. All this is compounded by the canopy. It is rather thick and moulded in a single piece with the only bit of framing marked out (and quite indistinctly) being that across the middle. A soaking in Future did not do much to improve it! But the very worst thing about the canopy is that it is the clear element only; there is no perimeter framing of any sort so you cannot pose it open. This makes attaching it to the fuselage a perilous operation as the fit has to be absolutely perfect (which it isn’t) and the potential to end up with it marked, or worse damaged, could be considered high. It took me two attempts and then I dropped the model towards the end of this build, had to re-attach it and fill some gaps, which means the completed model is no competition winner!
The rest of the fit was just fine and the accompanying instructions pretty clear.
Things I added were static wicks (suitably trimmed toothbrush bristles) on the wings, tailplanes and ailerons as they are very prominent on any F-16 and a Master set of turned brass nose pitot and angle of attack probes.
So what next?
Towards the end of the build - before the weapons load and an appropriate colour scheme could be selected I had to find an alternative set of markings. I spent a couple of evenings trawling through the options on a well-known supplier to plastic modellers, but nothing ‘grabbed me’; if it was to be a ‘relatively’ boring grey machine it had to be carrying something unusual (which is why the box markings had appealed in the first place), but I just couldn’t find anything. So what to do? I travel green whenever possible (well that was before Covid) and hence undertake some quite long train journeys for work. Before one such journey I picked up a ‘bookazine’ (as they style themselves these days) on the F-16 hoping for some inspiration. It worked! There was virtually nothing in the text but a photo of a line of F-16s, all in European 1 camouflage with a two-seater at the head, carrying green mavericks and AIM-9Js really got my interest. The caption didn’t give away much either! However, some serious searching on the internet determined that they represented a small number of aircraft which took part in ground attack trials in the late 1980s in the hope they would replace the A-10 (yeah right!!!). The twin-seater (75-0752) had a particularly interesting history, which is an article in itself. Needless to say the F-16 was hopeless in the Close Air Support role as it was too vulnerable, too fast and vibration was so bad when the pod mounted cannon was fired the aircraft nearly fell out the sky! Thankfully, Caracal do a very comprehensive sheet covering those F-16s which appeared in the ‘European 1’ scheme (in both 1/72 and 1/48); this includes a couple of technology demonstrators with an eagle spread across the tail fin, which did tempt me, but not for long. The weapons required (AGM-65D and AIM-9J)) came from the Hasegawa weapons boxings; I have gradually been acquiring these at model shows provided they are the ‘right price’ and they are serving me well.
Finishing off
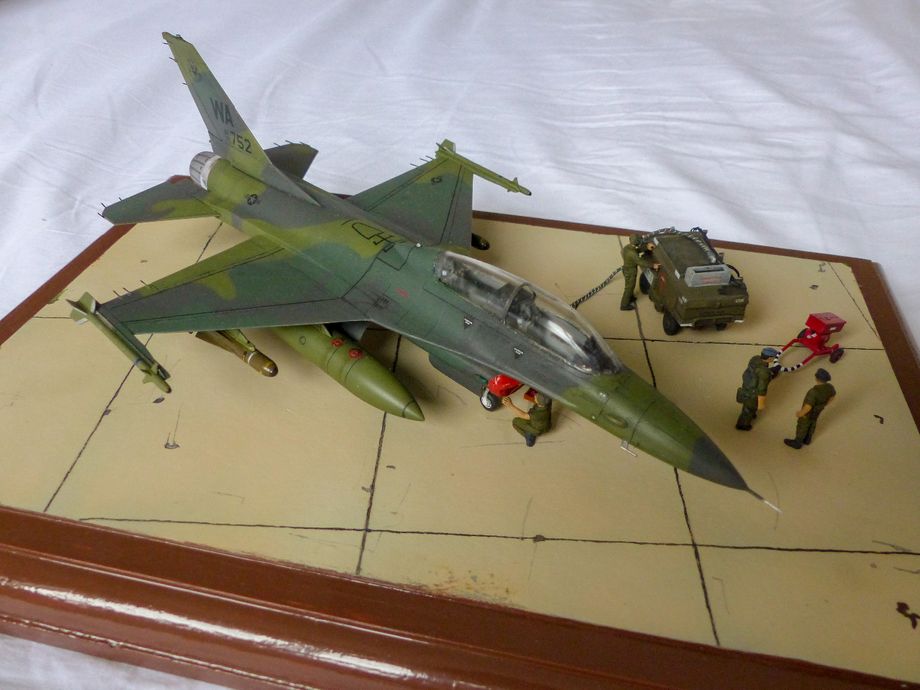
The three tone ‘European 1’ camouflage is wrap around, which made masking up and painting quite a laborious process even with the underwing pylons, ventral fins, tailplanes and under carriage left off to facilitate. I used Gunze acrylics, which provide the FS numbers required, but lightened each colour before application. Once this was done the model was clear coated with Gunze gloss acrylic and the decals applied from the Caracal sheet. This took an evening as there are actually not many at all. Another coat of Gunze gloss acrylic and a little light weathering (as all the photos I found show almost pristine aircraft) followed by a coat of Gunze matt acrylic meant we were as good as done. The remaining parts, which had been through a similar process of painting and clear coating were then attached and ‘mirrored’ the load out in the first image I saw: AIM-9Js on the wing tips, AGM-65Ds and large drop tanks under the wings. There seem to have been only four underwing hardpoints and no centreline hardpoint fitted to this aircraft.
In 1/72 the F-16 is quite a delicate thing and I found that whenever I picked it up to work on it I knocked a part off; the static wicks were particularly prone to this. As this is a model for the table and it would be picked up and transported a lot the decision was taken to attach it to a base and add a bit of interest in the form of some ground equipment and personal, again from the Hasegawa Ground Equipment and Pilot and Ground Crew sets picked up around shows.
The completed F-16B securely attached to its base to avoid 'handling damage', complete with supporting cast.
Should you?
I picked this kit up for a paltry £5 as a previously owned bargain in a very battered box and a couple of minor parts assembled, mainly out of curiosity. The plastic contents were a total surprise as the engraving is so beautifully delicate. Apparently, it has some shape issues but it went together really well. The only real negative is the cockpit in terms of its internals and the canopy itself. The decals issue can be forgiven due to their age. With some suitable enhancements it makes up into a thoroughly decent early F-16 in 1/72. If I come across any further boxings at the right price I shall undoubtedly indulge again. After all I now have a Caracal sheet offering rather nicely camouflaged F-16s to use up!
Footnote
As I said 75-0752 has a fascinating history. It was initially a YF-16B i.e. a pre-production aircraft, the second two-seater ever made. It became extensively used by both General Dynamics and Lockheed to test a whole range of modifications for F-16s. Early in its life it became a Wild Weasel testbed. At some point it acquired a ‘D-style’ cockpit including replacement of the early type ejection seats with ACES II and the larger tailplanes. During the Close Air Support trials it was fitted with both Pave Penny (a laser spot tracker) and Falcon Eye (an early version of night vision), although there is no evidence of either of these in the image I used as a basis for my model. In its life it was painted in ‘Charcoal Lizard’ camouflage several times, with at least two variations in the pattern known and at one time even had a grey nose cone. After the CAS experiment it was also used as the P&W220 and then a technology demonstrator (when it acquired the eagle with spread wings across the tail fin), before retirement to the Frontiers of Flight Museum in Texas.

